To maintain domain recipients and senders using the gateway manager, click on the button labeled Work with Sender and Recipient Templates. The following window will be displayed:
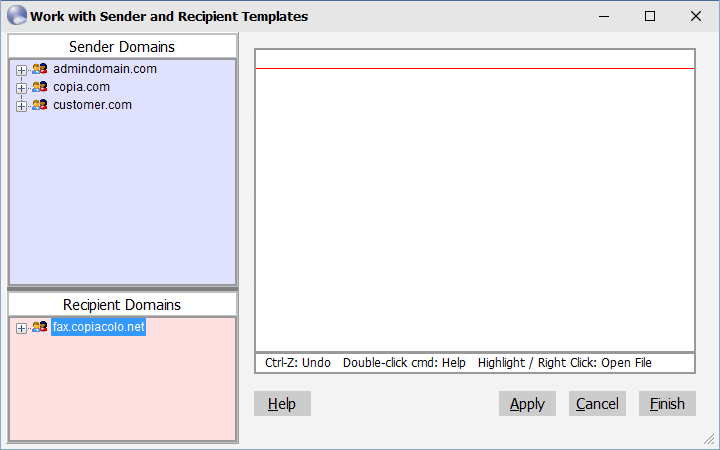
The Recipient Domains list consists of those domains listed as recipient domains on the Server tab. In earlier CopiaFacts releases both sender and recipient domain folders were together in the same folder. The Sender Templates folder defaults to FAXFACTS\GWTEMPLATES, but you can override this on the Validation tab. The Recipient Domain folders are in the default folder FAXFACTS\GwRecipientDomains, and are created automatically when you enter domains in the Recipient Domains list on the Server tab; recipient templates are optional in these domain folders.
The left panel will contain a tree view list of the domain folders currently located in your templates folders. Clicking on the marker next to the domain name will expand the tree node for the domain to reveal the mailbox names for senders allowed to send email to the gateway from the corresponding sender domain and valid recipient mailboxes within the recipient domain(s). For sender templates, the domain is the domain name for the sender's email service and not necessarily the domain name for their company.
When you click on a sender or recipient name to select that sender or recipient, the corresponding template file for the sender or recipient will be opened and displayed. The editor is colored to match the template type.
Special Template Names
Two template names have special properties and are excluded from use to validate a sender or process a recipient:
| default.FST | This is used to validate and process any sender in the sender domain or recipient in a recipient domain, if there is no match to a specific mailbox name. |
| UserTemplate.FST | This provides a convenient place to store the settings for use as each sender is added in a sender domain. An instance of this file in the root of the defined sender templates folder can also be copied into a new sender domain for use in that domain. As the file is copied in GWMANAGER, the name of the source domain, if present in a command, is changed to the destination domain. |
If you copy or move these files manually, be sure to check that the settings are correct for the new location.
Sender Templates
A typical sender template appears as:
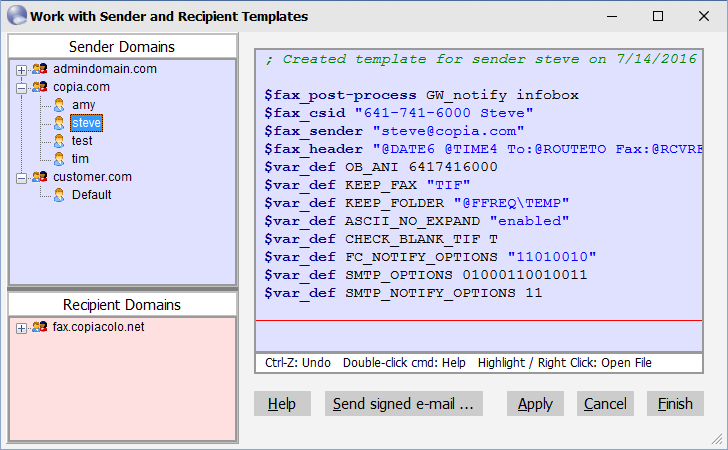
You may edit the template file and click on the Apply button to save the changes to the template file. You will be prompted to save any changes you made to the current mailbox before canceling or switching to a new template.
If accounting data, fax header, or opt-out numbers are required, you could also add in the template for example:
$var_def DATA1 "Acc:12345" ; post billing info
$var_def OB_ANI 8002516654 ; opt-out number
$var_def OB_TF_ANI 6303886900 ; toll free AN
$fax_csid "6417416000"
$fax_header "To: @Routeto Fax: @RCVRFAX
Recipient Templates
Every Recipient Domain should appear as a folder in GwRecipientDomains. Recipient Templates are optional, and are not required if the Gateway is to be used only for simple e-mail to fax operations.
A Recipient Template appears as follows:
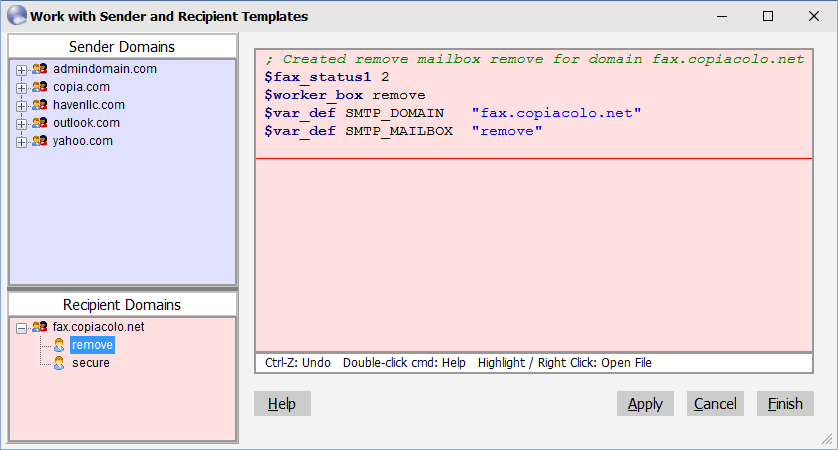
Adding a remove fax/email process for a domain automatically creates a recipient template like the one above. This worker box invokes a process to remove the sender’s email address or fax number from your subscriber list. It does this by adding the sender’s email address or fax number to the do not send database that the CopiaFacts server uses to prevent email or faxes from being sent to people who do not wish to receive them.
To create this mailbox and template, select Add Fax/Email Opt-Out Process from the right-click menu of a recipient domain name, and enter a mailbox name (the default name is remove). When an email message is sent to remove@copia.com the message will be processed to determine if the sender’s email address should be removed or if the sender has specified a fax number for removal in the subject. If the email subject contains a 10 or 11 digit number then this is assumed to be the fax number the sender wishes to remove from the subscriber list. Otherwise the sender’s email address will be removed from the subscriber list.
For more details of the template secure which appears above (for encrypted e-mails), see the Signed and Encrypted E-Mail topics.
Right-Click Menu
The right-click menu in both the sender and the recipient domain lists provides options for:
•Adding a new domain, with optional copy of the system UserTemplate.FST to the new domain folder.
•Adding a new sender or recipient mailbox and template
•Moving a mailbox from one domain to another (within the same section)
•Copying an existing UserTemplate.FST into the selected folder.
•Deleting a mailbox and template, or deleting a domain and its templates
•Displaying a dialog for setting options in the selected template
•Adding an opt-out process (template remove) in a recipient domain
•Grouping recipient templates for selection by wildcard.
To add a new sender domain, right-click below the defined items in the sender section on the left when no item is selected, and select the menu item to add a domain. The dialog allows a new domain to be added.
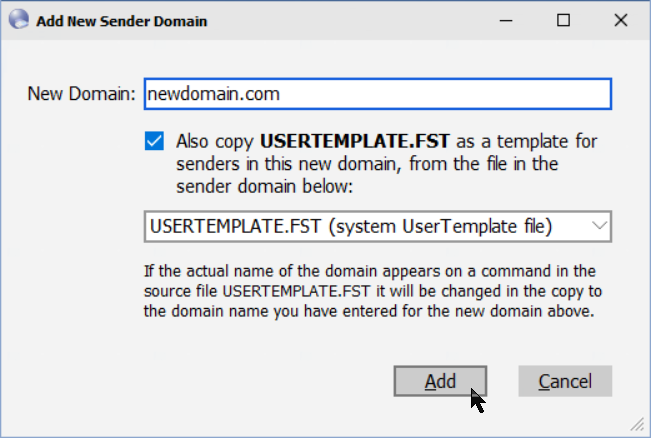
If you wish to create a user template for the new domain, you should check the option Also copy UserTemplate.FST. You can select either the system User Template file in the root of the Sender Templates folder (default FAXFACTS\GWTEMPLATES) or a UserTemplate.FST file from another sender domain folder. A domain name in the source FST file which matches the source domain will be changed to the domain name of the new destination domain.
Adding a Recipient Domain
 | New Recipient Domains must be added on the Service Tab. A new Recipient Domain folder will be created automatically. For users of earlier versions, the dialog on the Service tab will offer to move a recipient folder from the former common templates folder to the GwRecipientDomains folder. |
After adding a new recipient domain, you can select it in the left panel and add templates if necessary. For basic email-to-fax operations, no templates are needed.
Adding a Sender or Recipient Template
Right-click the domain name in the list on the left and select Add Sender or Add Recipient as appropriate.
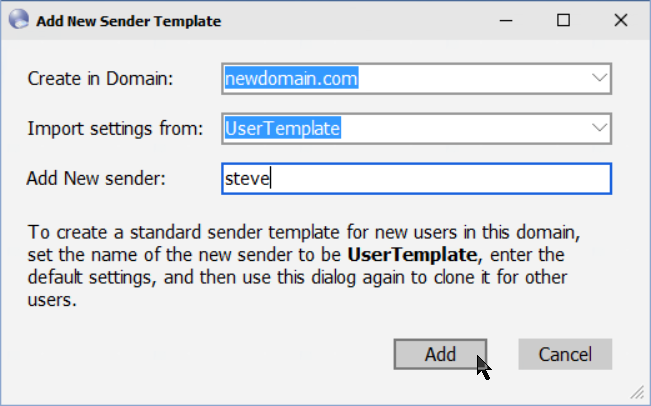
You can change in this dialog to add the sender in a different domain, and select another mailbox to import settings from. The name UserTemplate is special, and is automatically set in the 'Import settings' field when present in the domain folder. When you select <none> the template is created with just a single comment line.
Moving a Template to another Domain
Right-click a template name in the list on the left and select Move Sender or Move Recipient as appropriate.
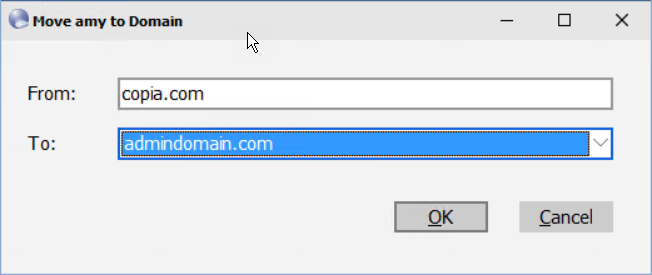
Templates can only be moved within the same section of the list; they cannot be moved between senders and recipients. You can also drag a template from one domain onto the domain name of another one.
Note that an e-mail address, if present in the template commands, will not be updated to show a new domain name.
Copying UserTemplate.FST to the selected domain folder.
Right-click a domain name in the list on the left and select the Copy UserTemplate menu item. This item will only appear if you have a UserTemplate.FST file in the root of the sender templates folder (default FAXFACTS\GWTEMPLATES).
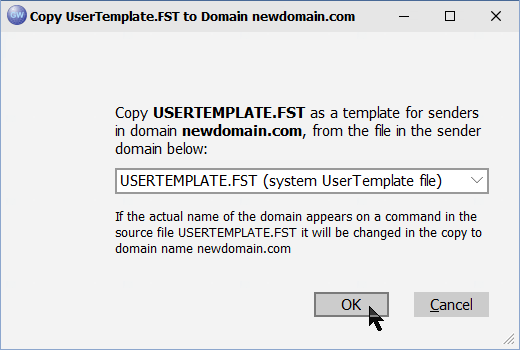
You can select either the system UserTemplate file or a user template file from another sender domain folder. A domain name in the FST file which matches the source domain will be changed to the domain name of the destination domain. You will be warned if the destination folder already contains a UserTemplate.FST file.
Right-click a domain or template name in the list on the left and select the Remove... menu item.
A confirmation dialog is displayed before the deletion is done.
Automatically creating an Opt-Out process
Right-click a recipient domain name to create a special sender template for adding items to your broadcast opt-out list.
The following dialog is displayed:
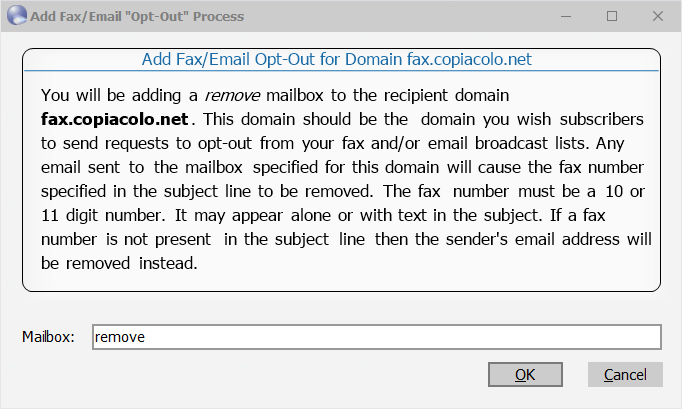
The mailbox entry names the recipient template that will be created to invoke the remove process. The default name is remove, but you may name it whatever you wish. In the example shown, a remove mailbox will be created for the domain copia.com. When an email message is sent to remove@copia.com the message will be processed to determine if the sender’s email address should be removed or if the sender has specified a fax number for removal in the subject. If the email subject contains a 10 or 11 digit number then this is assumed to be the fax number the sender wishes to remove from the subscriber list. Otherwise the sender’s email address will be removed from the subscriber list. The domain that you specify for the remove process must be a defined recipient domain.
You may delete the remove template just as you would any normal sender or recipient template. Keep in mind that the remove process is invoked by executing the remove script located in the DNSAdd folder located in the FAXFACTS folder. The user profile specified for the remove template must include this folder in a $script_locn command. The remove script is installed with the gateway.
You may customize the remove process by editing the remove script or by specifying another script to be executed when mail is sent to the remove mailbox. The remove mailbox is just one type of special mailbox that may be created to execute custom scripts when a message is sent to the mailbox.
Setting Sender Template Options
Right-click a sender template name in the list on the left and select Set SMTP Options/Password. The following full dialog is displayed:
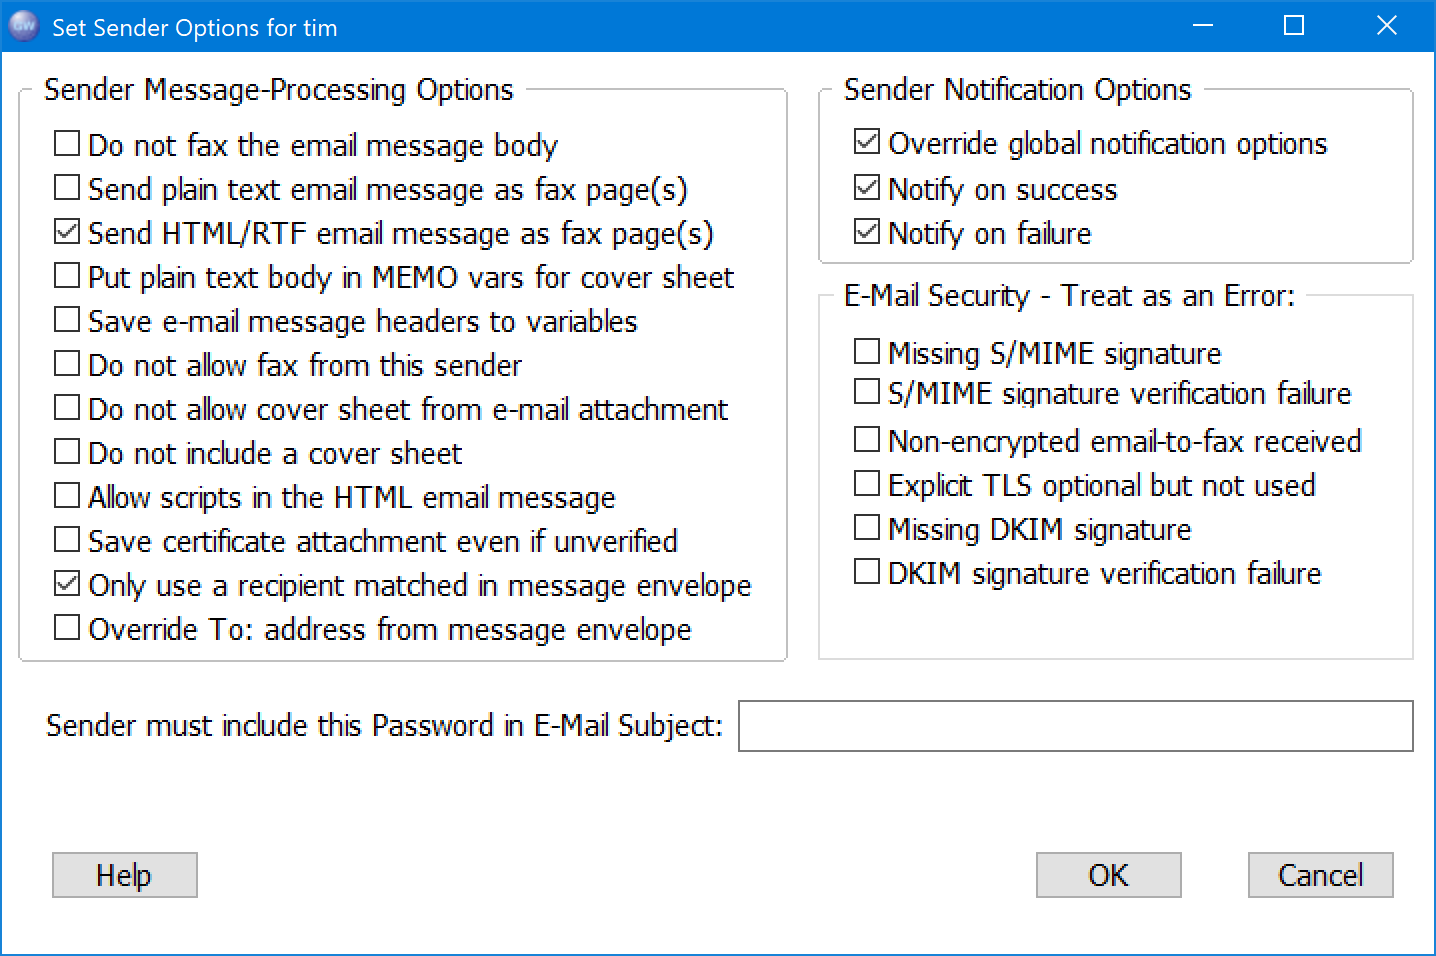
Here you will set the options that are stored in the template variables SMTP_SENDER_OPTIONS, SMTP_BODY_OPTIONS, SMTP_ERROR_OPTIONS, SMTP_NOTIFY_OPTIONS and SMTP_PASSWORD (these variables are not copied to FS files). You may enter these values directly into the template commands or use this menu option as a convenient way to set option flags and password without having to remember the syntax of the template commands. To remove a password from the template, just clear the password field.
For more details of the template for secure encrypted e-mails shown above, see the Signed and Encrypted E-Mail topics.
Sender Passwords
If you wish to have additional security checks for incoming e-mail you can require the user to specify a password in the subject line by adding it in the options dialog above, or adding the following command to the sender template:
$var_def SMTP_PASSWORD password
The password specified may appear anywhere within the subject line. It will be stripped from the subject before the subject is saved to the subject variable SMTP_SUBJECT. The variable definition SMTP_PASSWORD will not be written to the FS file. If an e-mail is received without a valid password, it will be rejected and saved to the rejected folder if the option to save rejected messages is checked. Keep in mind that the value of this variable may be set using the options from the sender templates menu.