Import All CopiaFacts Settings
CFIMPORT [exportedcfxsfile]
 | CEXPORT and CFIMPORT are scheduled for release in an upcoming build of CopiaFacts version 9. The features described in this topic may change before release. |
The CFIMPORT program uses a file created by CFEXPORT to populate or restore a CopiaFacts COPIA share and local registry entries on a new machine or on the original machine.
| Read the main Relocating the COPIA share topic before planning an export/import project. |
| Importing or restoring settings is an interactive task which needs more user involvement than just clicking one button. You will need to consider, and select in CFIMPORT whether: |
•you will move a separate file server or just individual server machine(s);
•to continue the NEXTxxx sequences of transaction numbers, or leave gaps;
•your CopiaFacts version is also changing;
•you have used hard-coded drive-letters and machine names in command files, instead of for example @FFBASE.
•machine names are changing rather than just being set up elsewhere.
The CFIMPORT program is used to import a CFXS exported settings file, either to the same or to a different machine. An exported settings file will always contain both local settings from the original machine and settings from the COPIA share, whether the share was on the same or on a different machine. CFIMPORT needs to be run elevated so that it has write access to the HKLM registry and protected folders.
Apart from the exported registry settings, the CFXS files do not include many local configuration files from the machine from which it was created. If the COPIA share also resided on that same machine, its files will have been exported as 'COPIA share files'.
The COPIA-share settings can be only be imported to an already existing specified COPIA share on any network machine, so you need to create the new COPIA share first, with suitable permissions, when moving the COPIA share to a new machine. The first buttons in the install manager COPIAINSTALL9 should normally be used to do this.
| It is recommended to do the settings export and import before running the server installer to install CopiaFacts programs on the new machine. However running the server installation later will not override already-moved copies of the principal command files such as CFG and USR. |
| After you run CFIMPORT once, it will register itself as the program to open .CFXS files, so that you can open an imported file by double-clicking it in File Explorer. |
Step 1 - Understand the contents of the exported CFXS file
The full set of file types extracted is documented in the CFEXPORT topic. There are three sources of these files:
•Files in the COPIA share (the majority of the files exported). Registry exports from the exporting machine are included because they will have been saved by CFIMPORT in the COPIA\FAXFACTS\System folder.
•Files with paths starting with a drive letter on the exporting machine (local or mapped).
•Files with UNC paths accessible from the exporting machine (and perhaps also from the receiving machine)
When the COPIA share is on the exporting machine, UNC pathnames, not local pathnames, will have been used in the export.
| CFIMPORT can import either only the COPIA share files, or the 'other' files or both. Drive letters can be changed, and changed to UNC paths when saving imported files but changing UNC paths to drive letters is not recommended. |
| Before importing the files, CFIMPORT will scan each one and change any of the file paths found to match the new position on the receiving machine, as necessary. |
Step 2 - Get the CFXS file to be imported, and verify the source
If the receiving machine already has a CopiaFacts version 9 environment, .CFXS files will be associated with CFIMPORT. If the CFXS pathname is not provided on the command line, CFIMPORT will wait for you to click Actions and load the file. The content of the Actions menu list reflects the stage you have reached in the import/restore process.
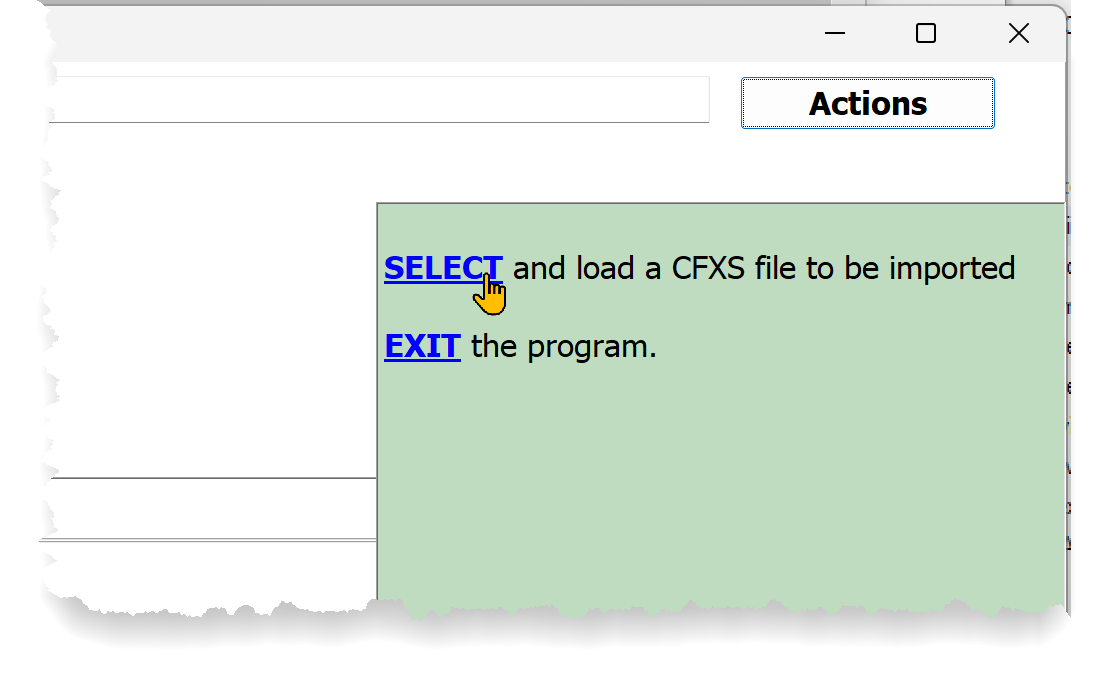
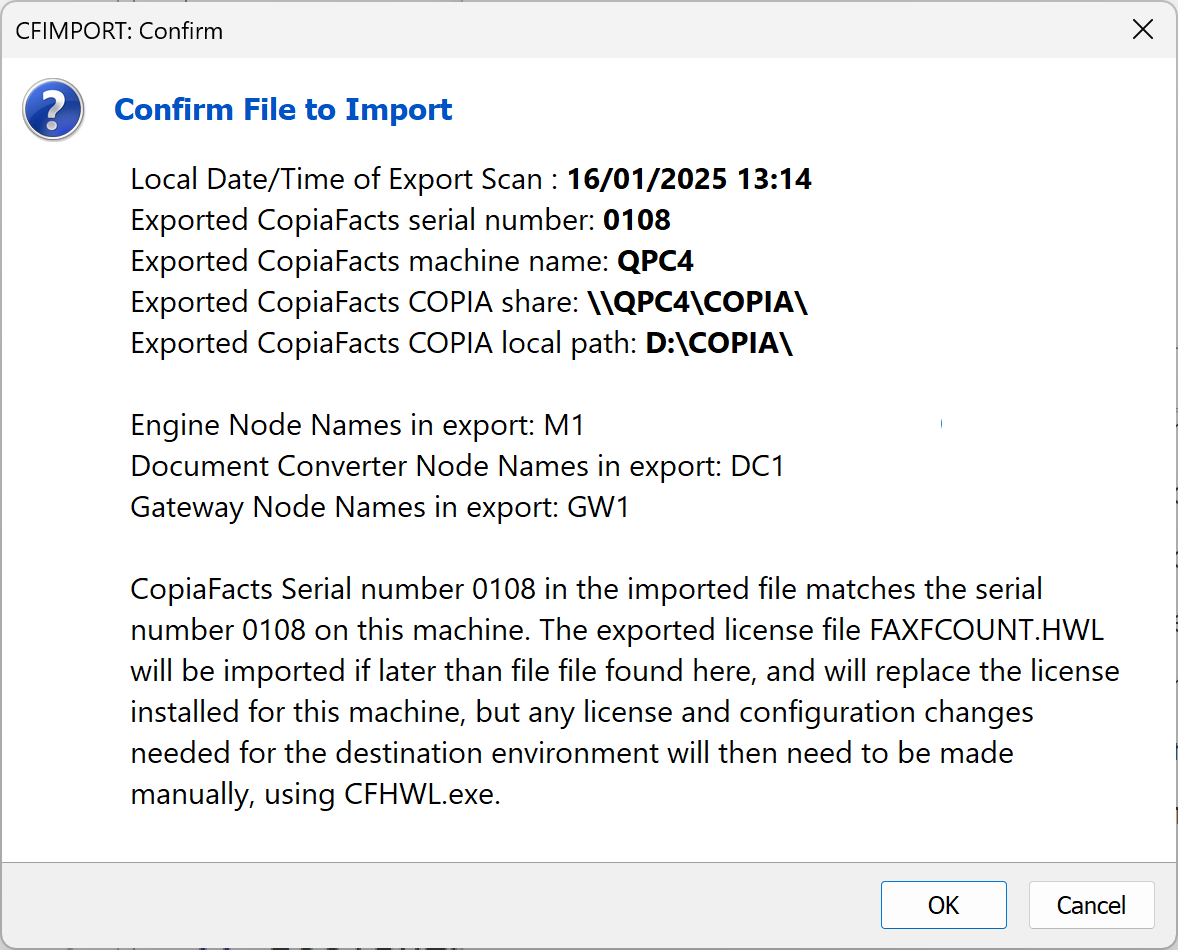
Step 3 - Verify the destination machine
CFIMPORT reports the environment of the CopiaFacts installation on the destination machine, and checks that a small test file can be written (and then deleted) on the local C drive and on the destination machine's Copia Share:
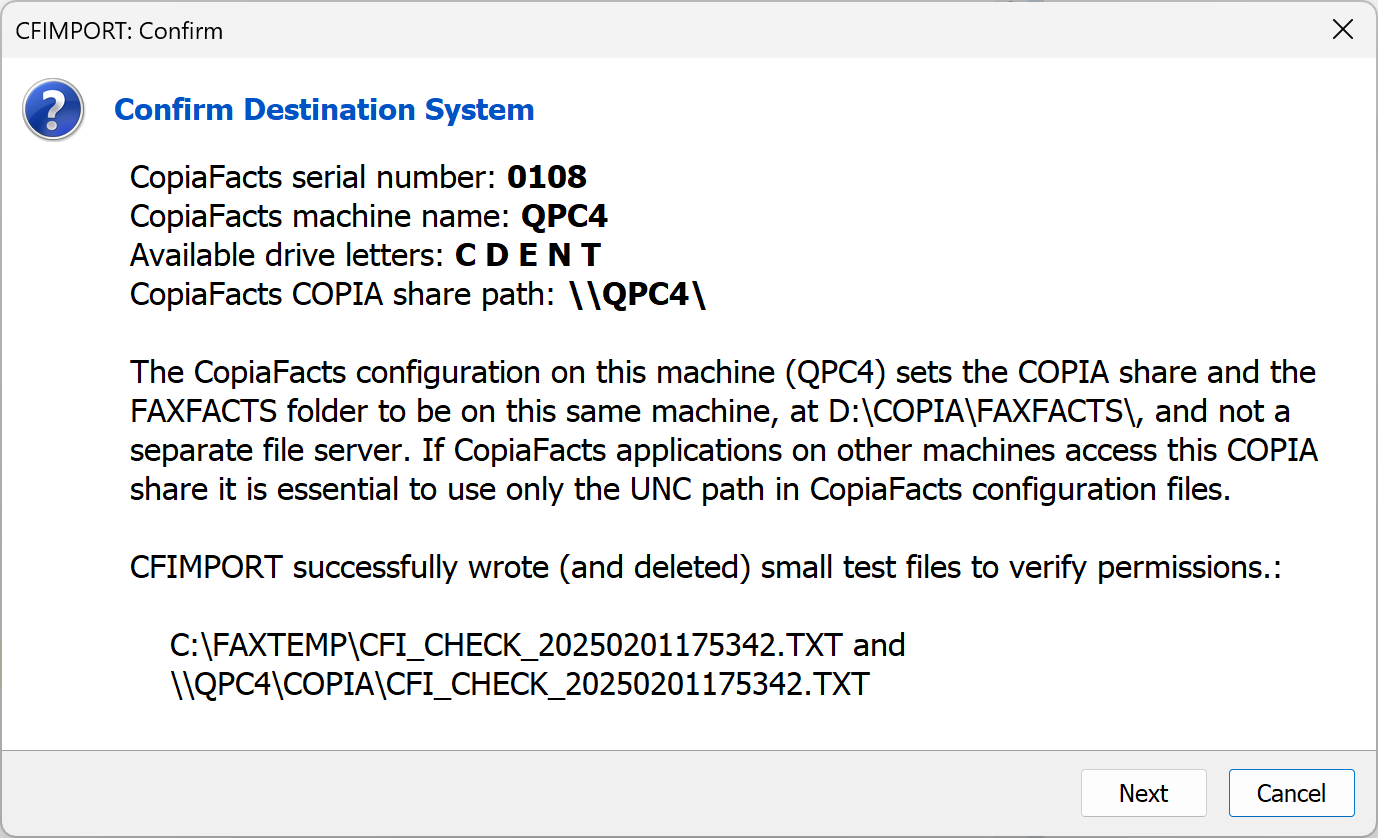
Step 4 - Specify 'Next' Files handling

Step 5 Inspect Scan Summary
CFIMPORT next scans the imported files and displays a summary of the contents. If you have a large network, and if the UNC paths are found in the imported files, first check the checkbox to disable the scan for Network machines". If this is enabled (default), CFIMPORT will look for the network machines named in the imported files, to find out if they are also visible to the machine importing the file. This can take a while on a large corporate network if your imported file contains machine names which are no longer in use. The setting of this checkbox is persisted for future import operations.
The imported settings files and registry values are next analyzed to detect any references to drive letters and network shares and node names, which you can select to be changed before the files are imported. In the scan, the following settings are omitted:
•Drive letters and UNC path names in command files which are on comment lines or follow a valid comment (;) character. Note that if you select to change these parameters where they appear elsewhere uncommented, any instances of the same value in comments will also be changed.
•Exported FAXFACTS\FFCFG.INI and ProgramData\Copia\CopiaConnect.INI will be scanned but will not replace existing copies of these files. These are set up by the CopiaFacts Sever Install Manager with the local IPv4 address and the details of the COPIA share respectively.
•Mapped drive letters (not recommended) from the original system will be displayed without their original mapping information. You can manually specify drive letters or UNC paths which CFIMPORT will use to replace the imported drive letters.
CFEXPORT also excludes by default the registry entries for window positions on the exporting machine, most-recently-used lists, and entry-field histories. It is recommended that you do not disable this exclusion.
The summary of the scan is displayed in three sections (this excample is a restore, not an import:
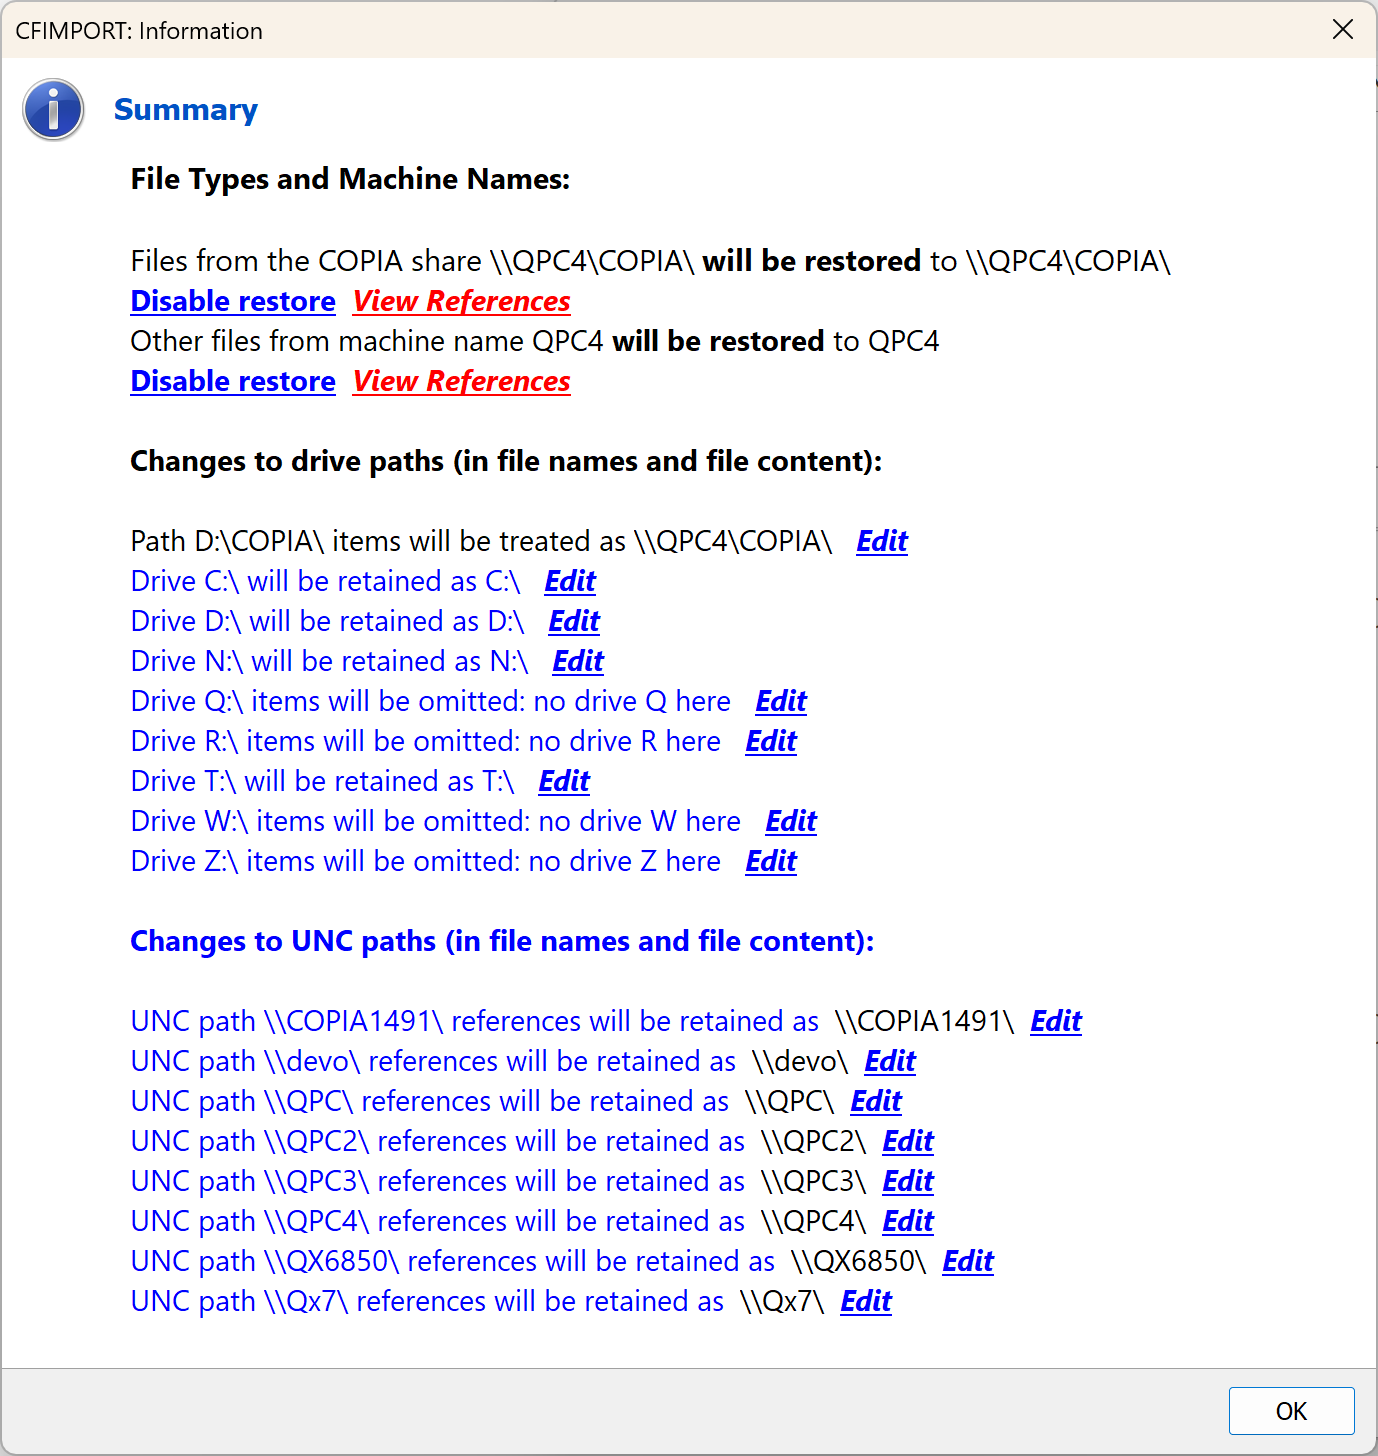
In the first section you can enable or disable the saving of the COPIA share files and of the Local files
The next two sections handle respectively the detected "drive-letter" paths and UNC paths.
| The default settings retain the same letters and paths, where possible. |
The detected drive letters and UNC paths will then be displayed for you to change any entries required on import.
Step 6 - Manual Edits, if needed, of Drive-Letter and UNC Paths
The Disable or Enable links in the first part of the dialog above can be used to select or de-select the Import/Restore of either all the COPIA share files or all the Local files.
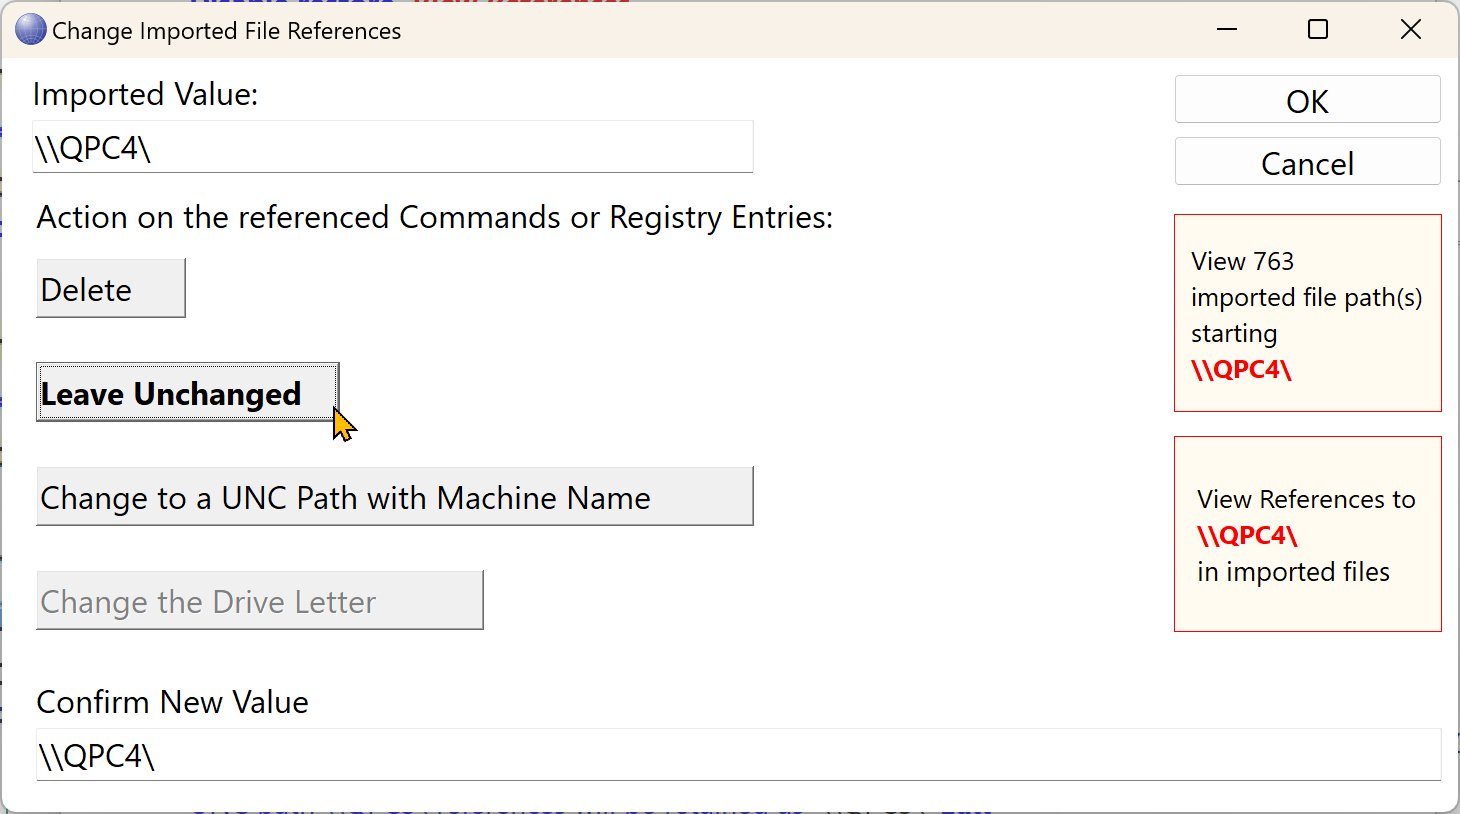
The View References links in the dialog pictured above will normally show only a few files, because most of the references in command files and registry entries will use a variable such as @FFBASE rather than a UNC or drive path.
In the second and third sections of the dialog, clicking the Edit link will bring up the fillowing dialog:
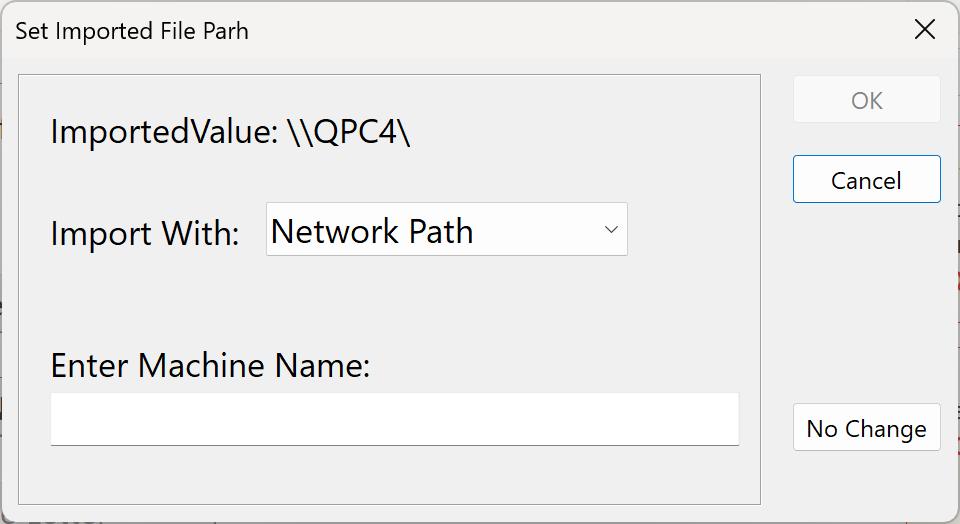
The buttons on the left affect all references in all files and registry entries to the selected UNC or drive path. The two 'Change' buttons allow you to specify the new value which will replace the old:
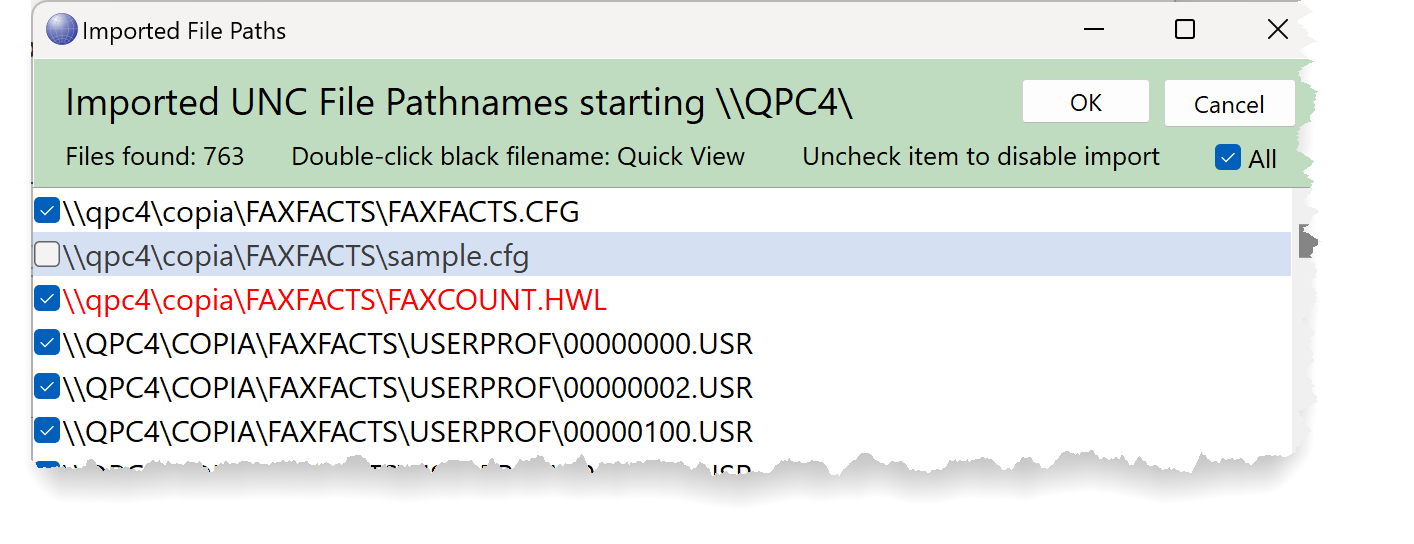
On the right, the View Pathnames button shows a list (which may be lengthy for the COPIA share files) of all the files to be Imported/Restored. You can delete any individual files, or display a quick view of the first few lines to check it. Files in red will be binary files, not viewable. Unchecking a pathname will suppress its Import/Restore:
The View References button displays a list of filenames in which the reference occurs, above an edit box which allows you to manually change the reference if you wish. If the file contains references to paths other than the one you are working with, they will be shown in blue.

Note that:
| Changes are made to the imported file in memory, not to a file in the old or new location. |
| If you 'commit' changes (to the imported file in memory) the file may still appear in the list of 'hits' at the top of this window, but the old values will have been changed to new, so would not be color-highlighted as seen above. |
| Manual edits will override the bulk changes specified for all references to the path. |
Automatic Import/Restore
To restore the imported file on the same machine, it will normally be unnecessary to make any of the changed described above. And when moving to a new machine, the Local Machine name, and the Copia Share Machine name will be set from the new machine's CopiaFacts configuration; in addition you may need to change a drive letter or UNC path.
After reviewing all the changes, use the Action Menu to import or Import the files.
You can use the Action Menu re-scan button to repeat the scan. but your changes will be lost.
When the edits have been made you are ready to perform the import as described below.
Manual Editing of the Import
For special purposes it is possible, but not recommended, to make manual edits to the configuration files before they are imported. You can use the lower panel of the View References dialog to do this. Note that:
•Your edits will be lost if you do not either import the .CFXS file or re-save it before closing CFIMPORT.
•Editing registry import files must be done very carefully to avoid unwanted changes. CFIMPORT will not check in advance for any syntax errors.
•In registry (.REG) files, backslash must be used to escape double-quote (\") and backslash (\\) and newline (\\n) characters.
•After editing a file, you must commit the changes to the in-memory copy, or cancel the changes. This does not change any file on the disk until you perform the import.
Finally, you can choose to import all the files with the changes that have been made. An option checkbox is provided to make a backup when a file exists already.
FFTRACE will record the import details if CFIMPORT is enabled under File/Applications. Selecting low-level debug messages in FFTRACE will also record the unpack, drive/UNC path detection, changes, and saving of each file to the disk.
File TimeStamps
The file timestamps in the imported file are the UTC date of last modification, and will be set as both the creation date and last modification date of the file written to the destination file system. Created folders will have a current time stamp of creation. The UTC date will be applied to saved files, which will therefore show the same clock time in the source and destination when imported into a machine in a different timezone than the source.
If the "check for earlier time stamp" checkbox is checked in CFIMPORT, files in the ZIP will not be imported if they have an earlier timestamp than an existing file of the same name. They will also not be imported if they show the same UTC second as a destination file, since the seconds value is not saved in the .CFXS file.
It is possible to re-save a .CFXS file before or after importing the file. This may be useful if you are unable to complete in a single session the manual editing of settings for moving an installation.
| The saved file only uses the file content changes made in memory. The file pathnames are not changed for a new location, and you will need to repeat the required new path changes if you reload the saved CFXS file. This means that the CFXS file will always retain the pathnames from the export. |
Processing Sequence
| When used to ''move'' an installation to a new machine or VM, it is recommended that all CopiaFacts applications and services should be shut down for the duration of the transfer. However CFEXPORT will retry the processing of locked files using the specifications in $lock_tries. |
| A CopiaFacts environment will need to be set up using COPIAINSTALL9 on a new machine before importing the file saved by CFEXPORT, but you should normally do the settings export and import before running the server installer to install CopiaFacts programs on the new machine. |
| This program is compatible with CopiaFacts version 8 and can be used to import a backup or export of a version 8.3 CopiaFacts installation. It has not been tested with CopiaFacts releases older than 8.3. |