Configuring the OPTOUT Sample Application
OPTCONFIG
This utility is used to simplify configuration of the OPTOUT Sample Application.
 | If you do not have a SAMPLES\OPTOUT folder, you will need to run the Copia Server Installer again (for the same version that you currently have installed) and select only the OPTOUT application in the list of samples in the right-hand panel. This will install the IIF and voice files for the application in this folder. |
The first step involves reading your FAXCOUNT.HWL license file to find all channels configured for voice. If you have no channels configured for voice, you will need to run CFHWL to select the node and the channels which will be used for the opt-out Interactive Voice Response (IVR) application. If you have no channels licensed for voice applications, contact Copia Sales to add voice licenses for your fax boards (if available) or to add Copia VoIP Ports. which do not require boards.
The initial screen shows available voice channels:
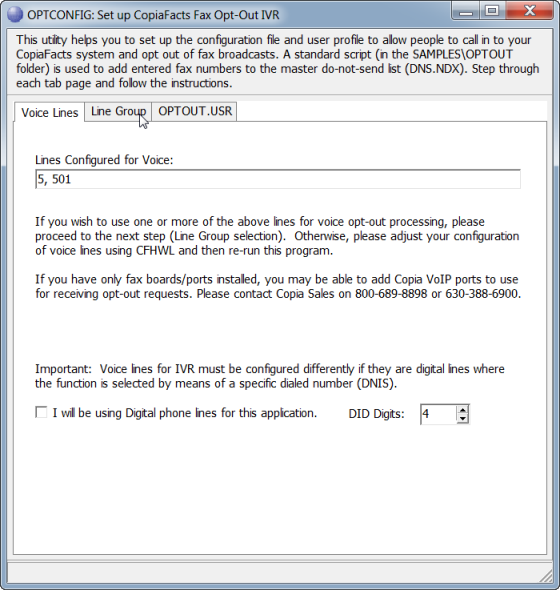
Analog Voice Lines or Copia VoIP Ports
If you have Analog Voice Lines or Copia VoIP Ports, and the screen shows configured channels, click on Channel Group:
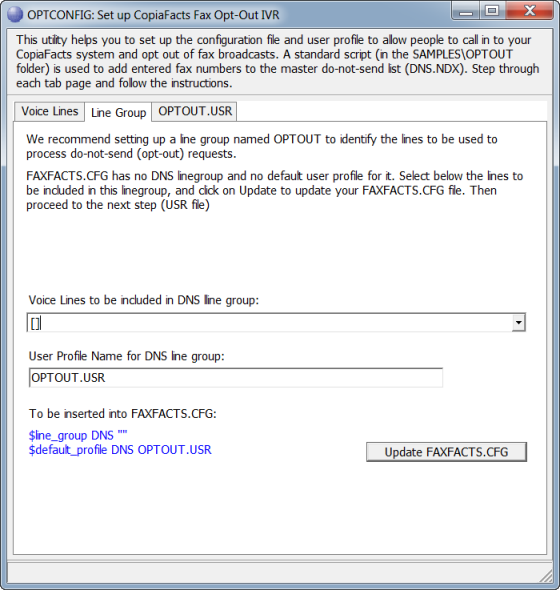
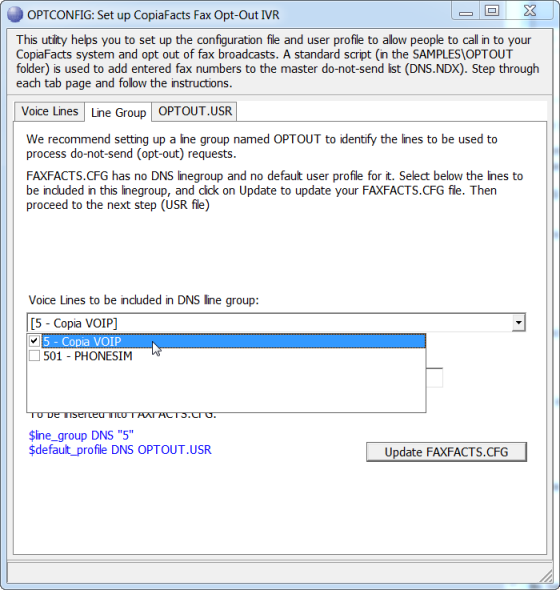
This screen allows you to pick which voice channels will be added to the DNS channel group. Select the channel or channels from the pulldown:
Then click one Update FAXFACTS.CFG. This will add the commands shown in blue to the file:
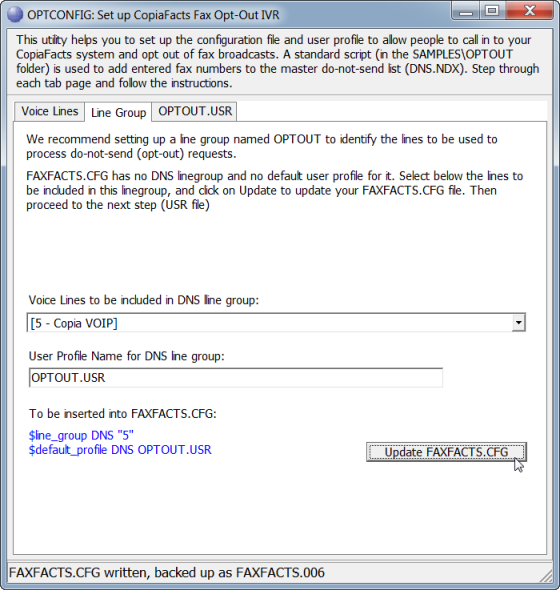
You are then ready to configure the USR file as described below.
Digital Voice Lines
For systems with digital lines, you will normally not require a channel group or OPTOUT.USR. Instead you will need to set up a numeric-named USR file selected from the dialed number. First click the checkbox on the initial screen and verify that the number of DNIS digits is correct:
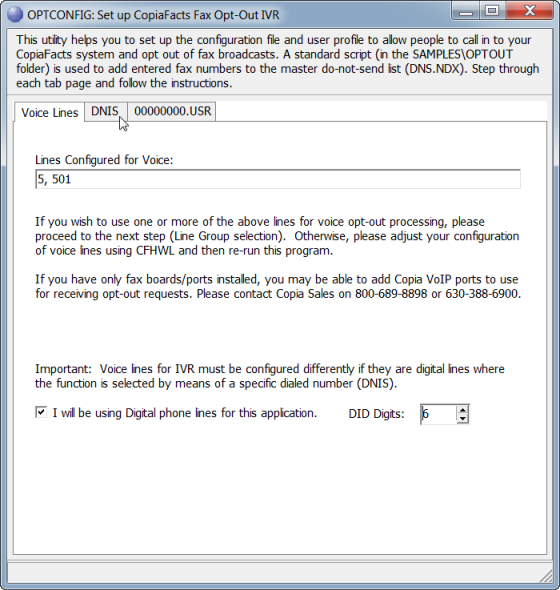
Then click the DNIS Tab and enter the DNIS number to be used for opt-out IVR, which will be placed on the third tab. If you want to allocate multiple numbers, you will need to manually copy the created USR file.
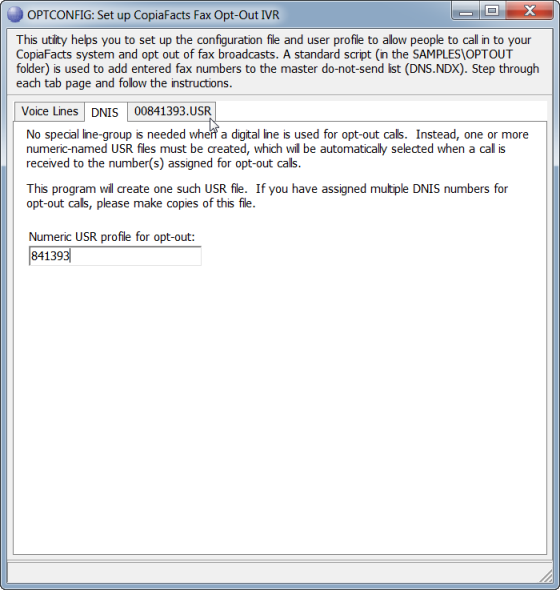
Then click the USR tab to configure the USR file.
USR File Configuration
To configure the opt-out USR file, you can use the edit boxes and checkboxes to modify the USR commands shown in blue:
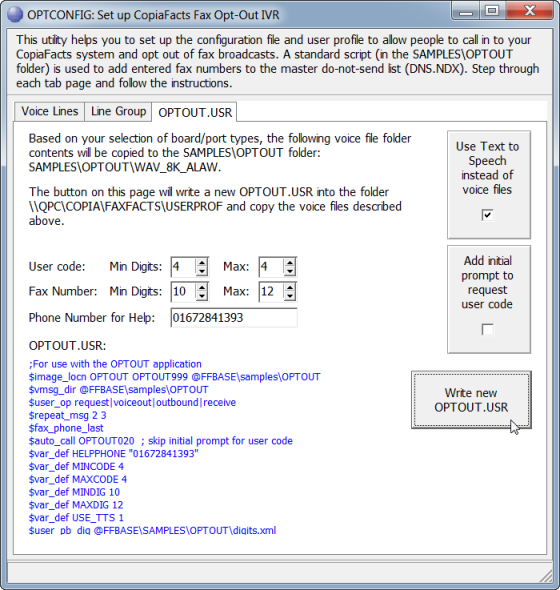
The following changes can be made:
| Use TTS | This checkbox adds the USE_TTS variable and the $user_pb_dig command. |
| Add Initial Prompt | This checkbox changes the $auto_call command to start the script at OPTOUT010 instead of OPTOUT020. This adds an extra prompt for a code which will be used as the name of the .NDX file to be updated. The default is to update DNS.NDX. |
| User Code | Specifies the digit count for the code to be entered after the optional initial prompt. Placed in MINCODE and MAXCODE variables. |
| Fax Number | Specifies the number of digits to be entered in the fax number to be blocked. Placed in MINDIG and MAXDIG variables. |
| Help Phone | Specifies the number to be spoken (if required) to tell the caller where to call for help. Placed in the HELPPHONE variable. Leave blank if not required. |
When you have set up the USR file as required, press the Write New USR button. The write will be confirmed on the status bar. This completes the processing and you can close the application.